How to create a spring boot application containing the Camunda BPM Engine

This post contains a step-by-step guide on how to create a simple Spring Boot application containing the Camunda BPM Engine and a simple BPMN process.
- What is Spring Boot
- What is Camunda
- Getting Started Guide
- Compile & Run The Example
- View Camunda Admin Console
- View the H2 Console
- Example Code
- Finally
This post contains a step-by-step guide on how to create a simple Spring Boot application containing the Camunda BPM Engine and a simple BPMN process. Camunda BPM is an open-source workflow and decision automation platform.
What is Spring Boot
Spring Boot makes it easy to create stand-alone, production-grade Spring based Applications that you can “just run”. We take an opinionated view of the Spring platform and third-party libraries so you can get started with minimum fuss. Most Spring Boot applications need minimal Spring configuration. Spring Projects
What is Camunda
Camunda Platform is an open-source workflow and decision automation platform. Camunda Platform ships with tools for creating workflow and decision models, operating deployed models in production, and allowing users to execute workflow tasks assigned to them.
Getting Started Guide
The following is a quick start guide on how to create a Camunda BPM Runtime in a Spring Boot application.
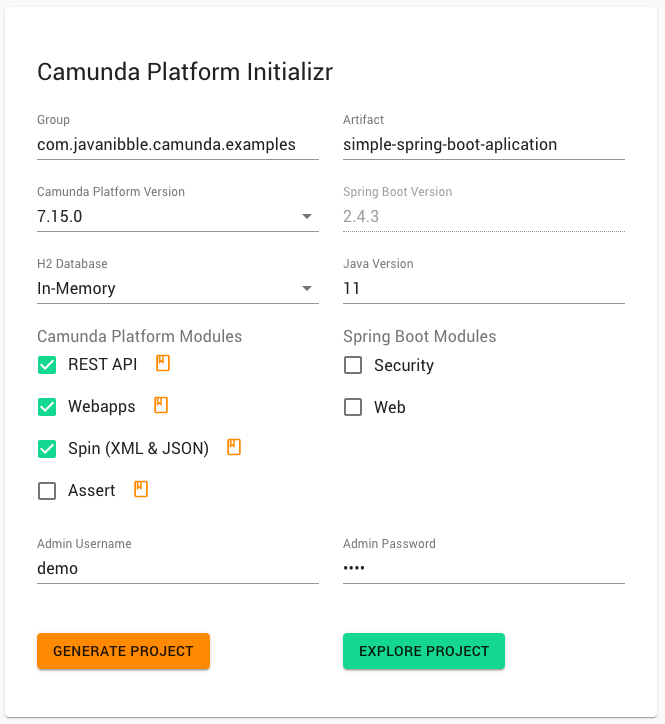
Step 1: Use the Camunda BPM Initializr
Use the Camunda BPM Initializr website to assist you in generating a Spring Boot application. Open the following URL in a browser and complete the form to bootstrap your application.
Step 2: Update the Project Object Model (POM)
The Project Object Model (POM) is an XML file that contains information about the project and configuration details. The pom.xml file is used by Maven to build the project. Ensure that the Spring Boot and Camunda BOMs and other dependencies are added to your Project Object Model.
<project>
  <dependencyManagement>
    <dependencies>
      <dependency>
        <groupId>org.springframework.boot</groupId>
        <artifactId>spring-boot-dependencies</artifactId>
        <version>2.4.3</version>
        <type>pom</type>
        <scope>import</scope>
      </dependency>

      <dependency>
        <groupId>org.camunda.bpm</groupId>
        <artifactId>camunda-bom</artifactId>
        <version>7.15.0</version>
        <scope>import</scope>
        <type>pom</type>
      </dependency>
    </dependencies>
  </dependencyManagement>

  <dependencies>
    <dependency>
      <groupId>org.camunda.bpm.springboot</groupId>
      <artifactId>camunda-bpm-spring-boot-starter-rest</artifactId>
    </dependency>
    <dependency>
      <groupId>org.camunda.bpm.springboot</groupId>
      <artifactId>camunda-bpm-spring-boot-starter-webapp</artifactId>
    </dependency>
    <dependency>
      <groupId>org.camunda.bpm</groupId>
      <artifactId>camunda-engine-plugin-spin</artifactId>
    </dependency>
    <dependency>
      <groupId>org.camunda.spin</groupId>
      <artifactId>camunda-spin-dataformat-all</artifactId>
    </dependency>
    <dependency>
      <groupId>com.h2database</groupId>
      <artifactId>h2</artifactId>
    </dependency>
    <dependency>
      <groupId>org.springframework.boot</groupId>
      <artifactId>spring-boot-starter-jdbc</artifactId>
    </dependency>
  </dependencies>
</project>
To view the complete pom.xml file, please use the following link.
Step 3: View the default Application class
The Camunda BPM Spring Boot application is implemented by a class called Application. The class contains the @SpringBootApplication annotation that enables the spring boot auto configuration mechanism, enables the component scan on the packages and allow to register extra beans in the context.
@SpringBootApplication
public class Application {

    public static void main(String[] args) {
        SpringApplication.run(Application.class);
    }
}
Step 4: Configure the Camunda Spring Boot Application
The properties and configuration of the Spring Boot Application can be found in the application.yaml file within the src/main/resources folder. To startup your Camunda BPM Spring Boot application, you need to set some properties to allows you access. The complete set of properties for Camunda can be found here.
The properties to configure your admin-user are listed below:
spring.datasource.url: jdbc:h2:mem:camunda-h2-database;DB_CLOSE_DELAY=-1;DB_CLOSE_ON_EXIT=FALSE

camunda.bpm.admin-user:
id: demo
password: demo

spring.h2.console:
enabled: true
path: /h2-console
Step 5: Add a process definition using BPMN
The Camunda Modeler is used to create a new process definition. The process definition contains a Service Task that is configured to invoke a Java Delegate within the Spring Boot application. The Java Delegate class retrieves the personal-message variable from the process and prints it out to the console.
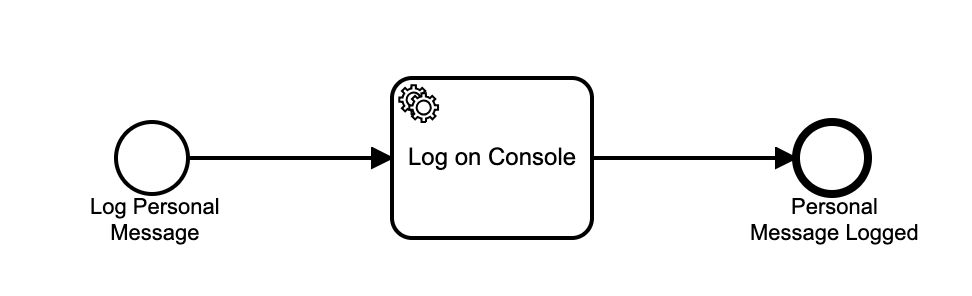
Place the personal-message.bpmn file in the src/main/resources folder of your project. To view the complete personal-message.bpmn file, please use the following link.
For more details on how to create a simple BPMN flow, read the following post called How to Model a Simple BPMN Flow using Camunda Modeler
Compile & Run The Example
1. Compile the application
Use the following command to compile the Spring Boot application making use of maven:
$ mvn clean install
2. Run the application
After you have successfully built the Camunda BPM Spring Boot application, the compiled artifact can be found in the target directory. Use the following command to start the Camunda BPM Spring Boot Application.
$ maven spring-boot:run
3. Execute the example
After the application has started, run the following command in another terminal:
Run the command: Start Process Instance
The following command instantiates a new instance of the personal-message process and pass the process variable called personal-message with a value of Hello World !!! to the process engine as part of the request body.
$ ./start_process_scenario_01.sh
The script performs the following commands:
curl --location --request POST 'http://localhost:8080/engine-rest/process-definition/key/personal-message/start' --header 'Content-Type: application/json' --data-raw '{
     "variables": {
         "personal-message": {
             "value": "Hello World !!!",
             "type": "String"
        }
    }
}'
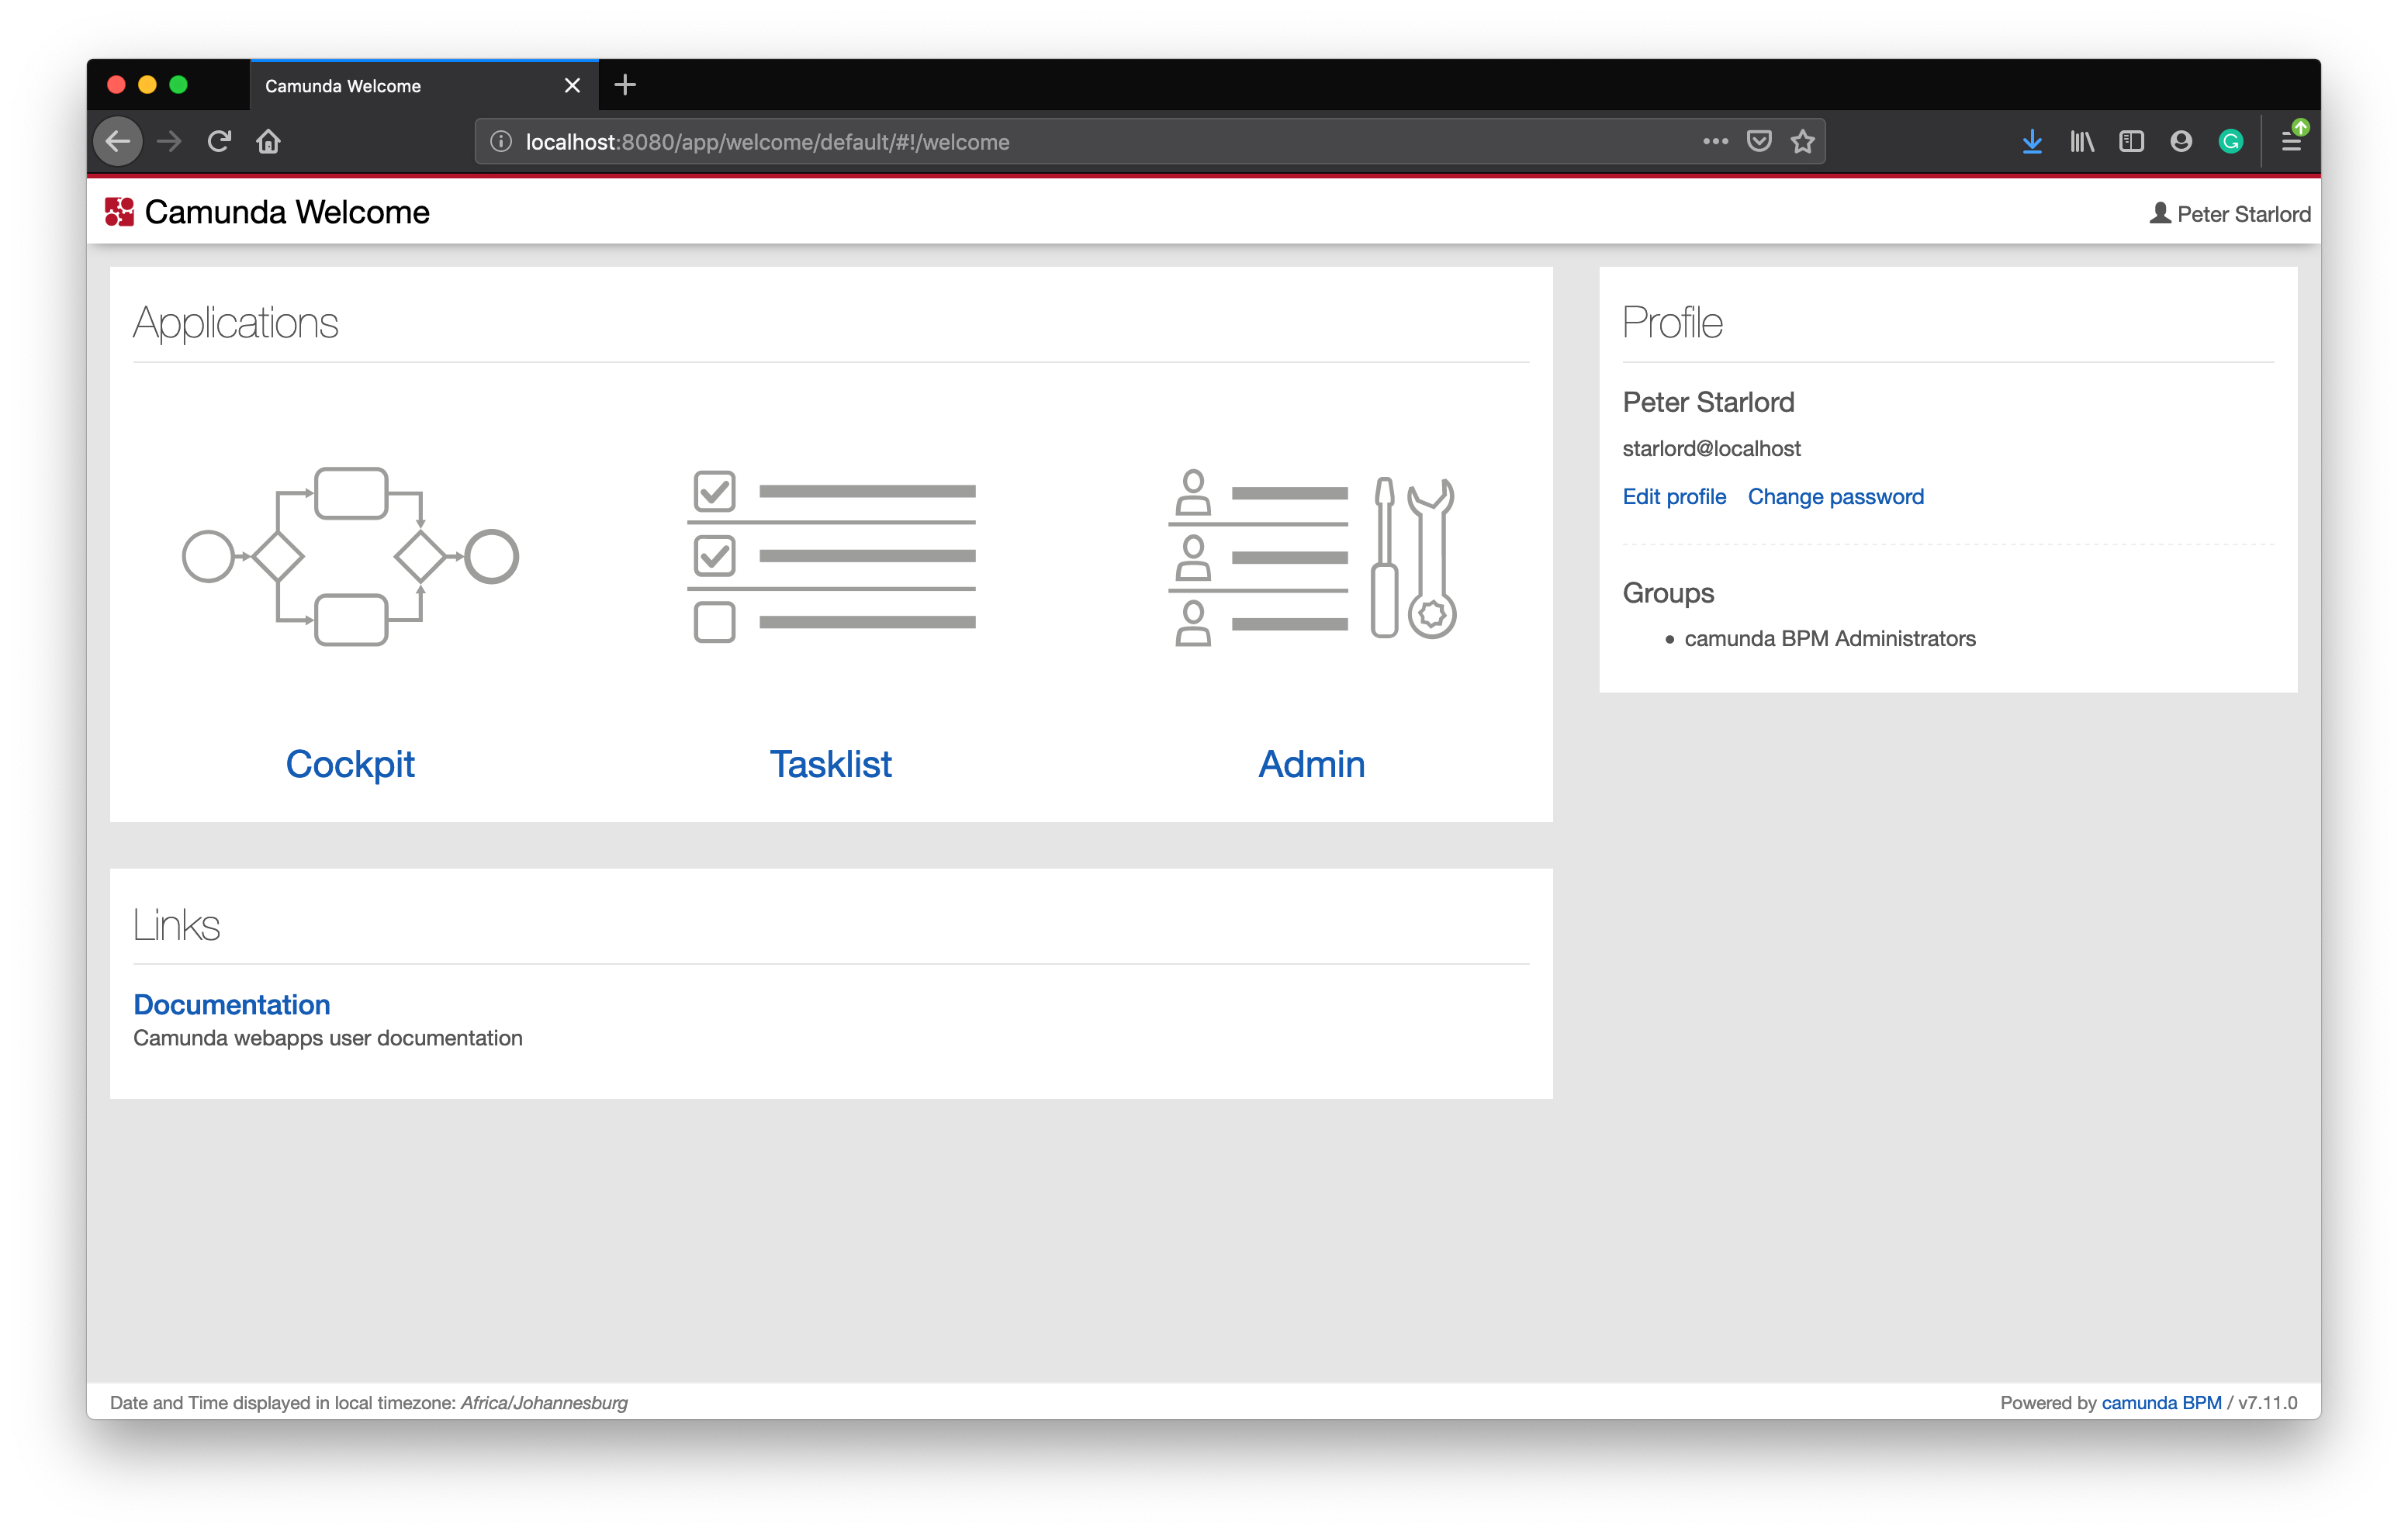
View Camunda Admin Console
To view the Camunda Admin Console, type the following url in your browser while the application is running. You will be prompted with the login screen.
After you have typed the above URL in a browser while the application is running, you will be prompted with the login screen. The image display the default settings for the H2 console and will allow you to login withou a password.
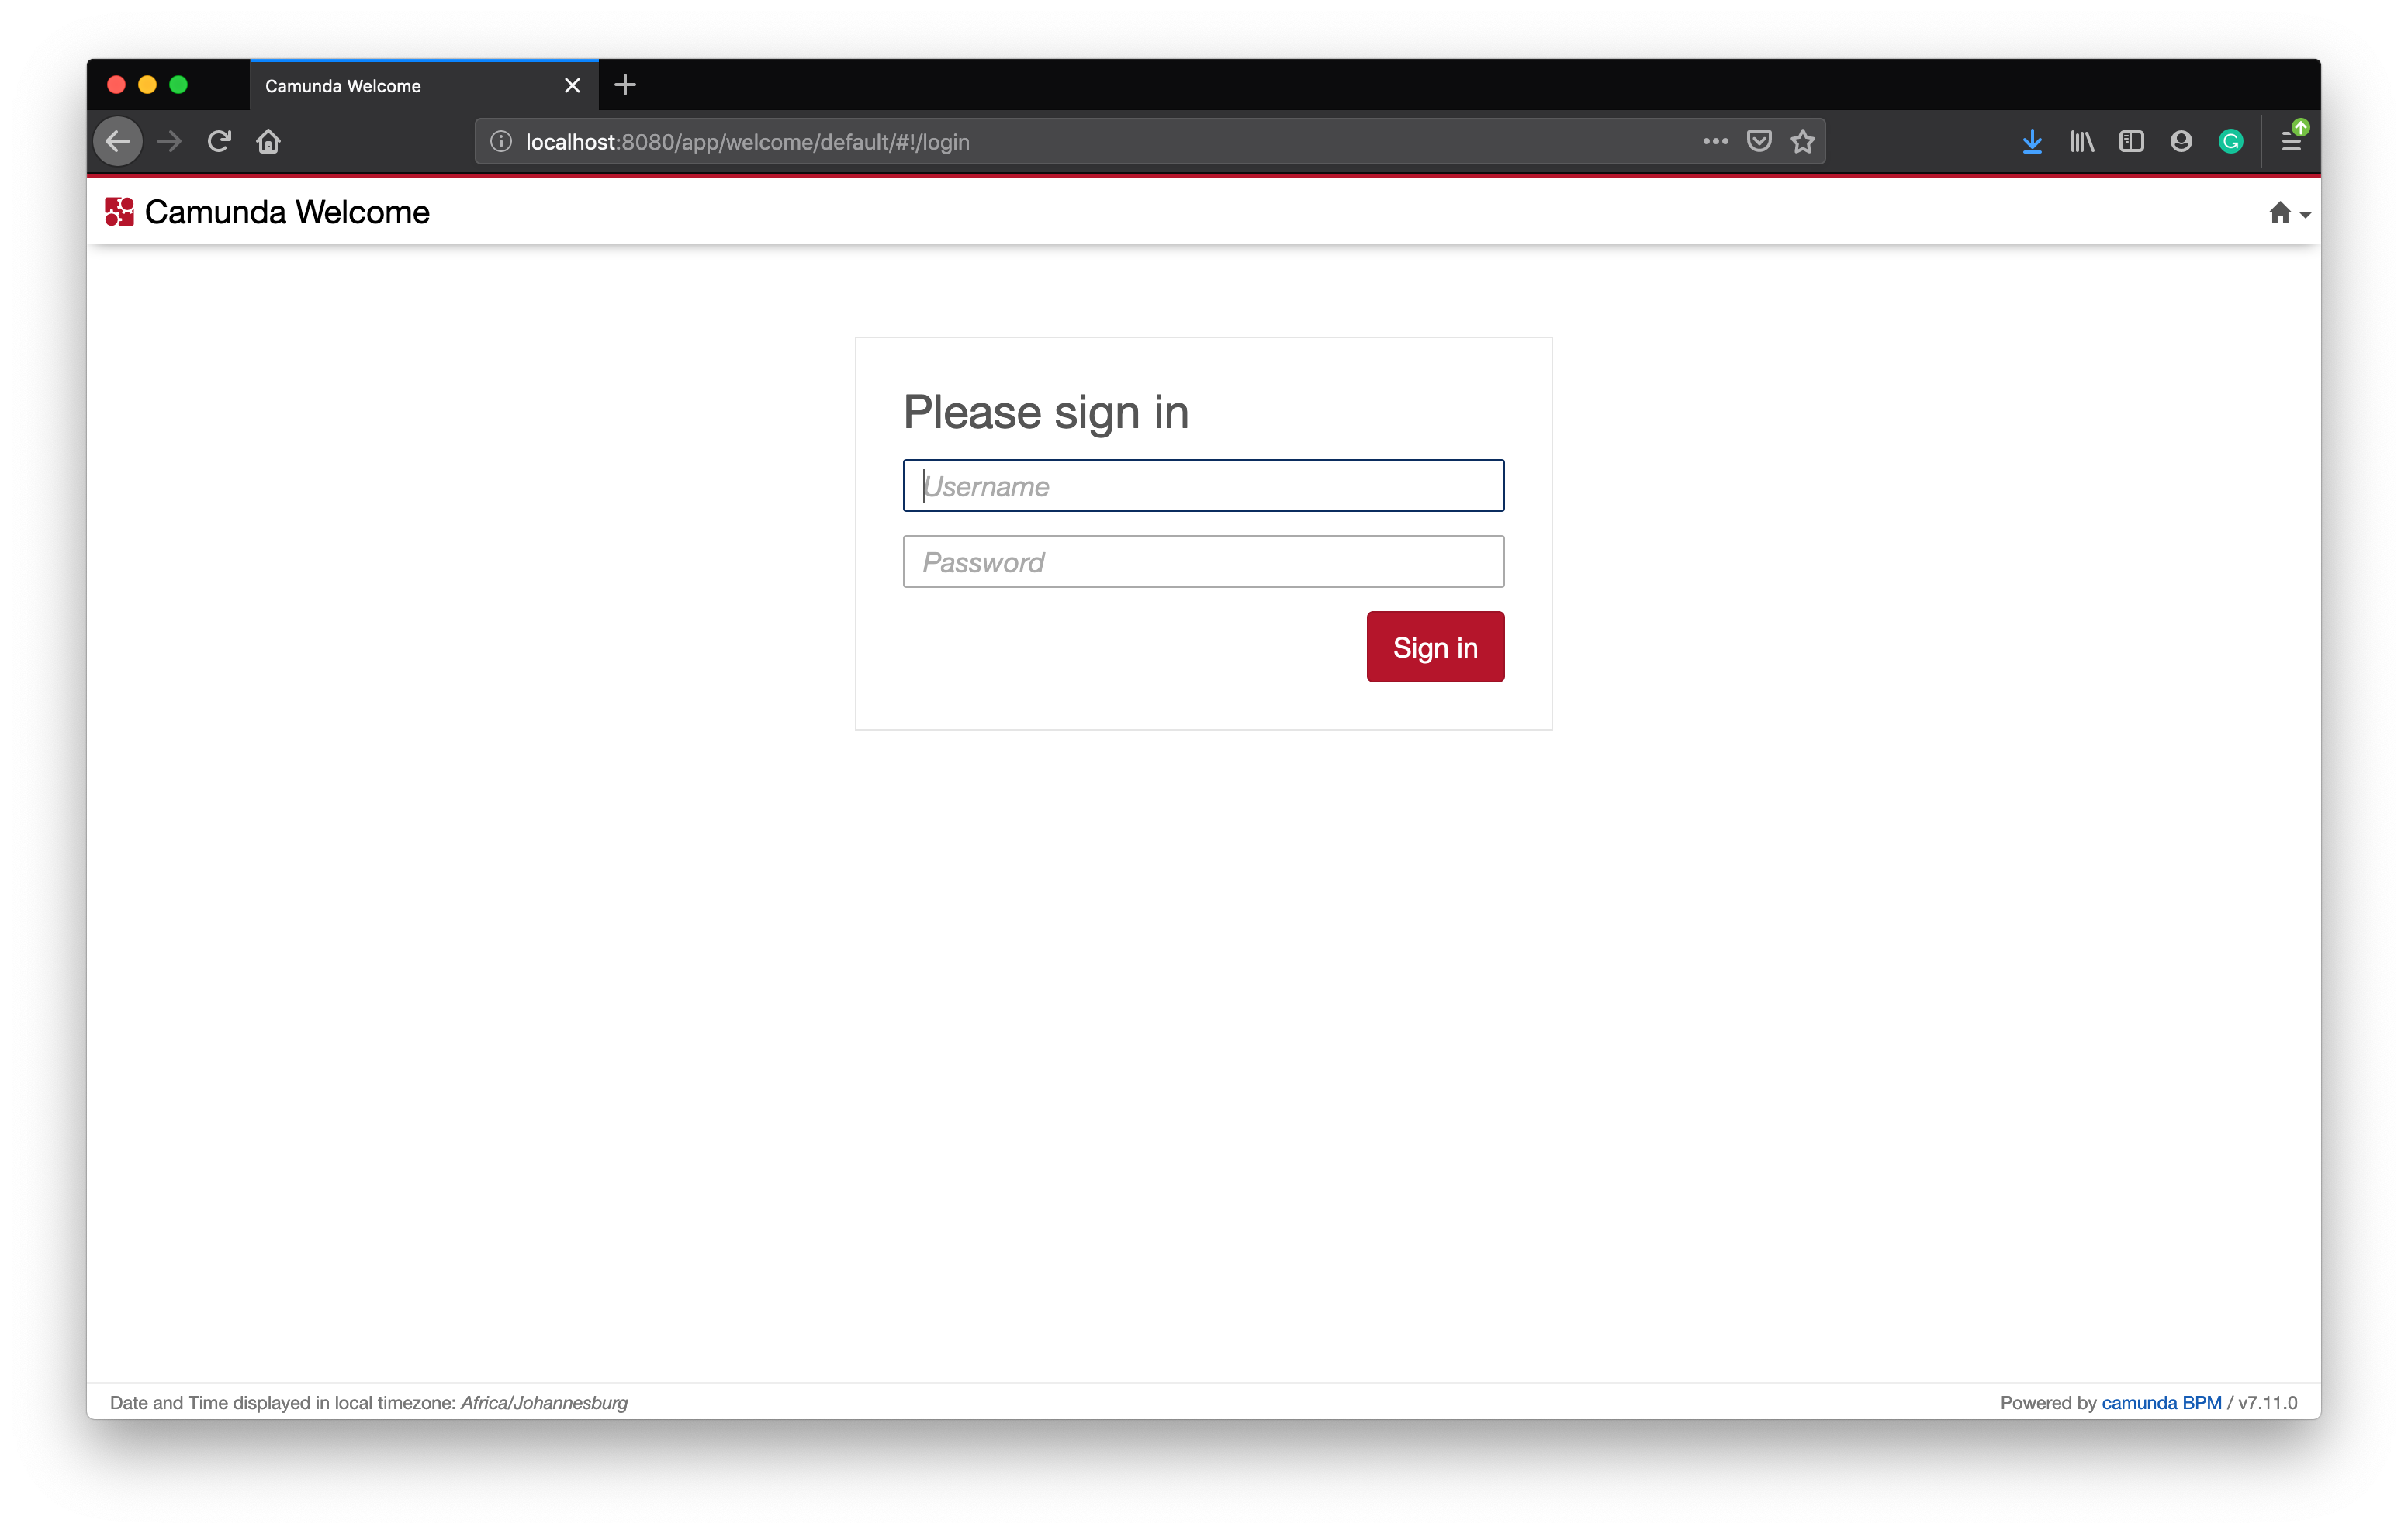
Type the Username and Password you set within the application properties file. Once you have successfully authenticated, you will be see the Admin Dashboard.
- Username: demo
- Password: demo
View the H2 Console
To view the H2 Console, type the following url in your browser while the application is running. You will be prompted with the login screen.
After you have typed the above URL in a browser while the application is running, you will be prompted with the login screen. Press the connect button since there is no password specified.
Example Code
The source code used in this example can be found on Github.
Finally
Congratulations !!! You have successfully created a Camunda BPM Spring Boot Application. Follow me on any of the different social media platforms and feel free to leave comments.